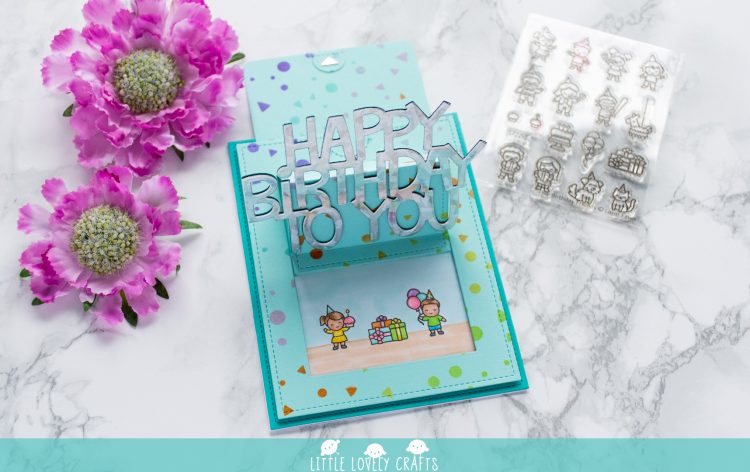
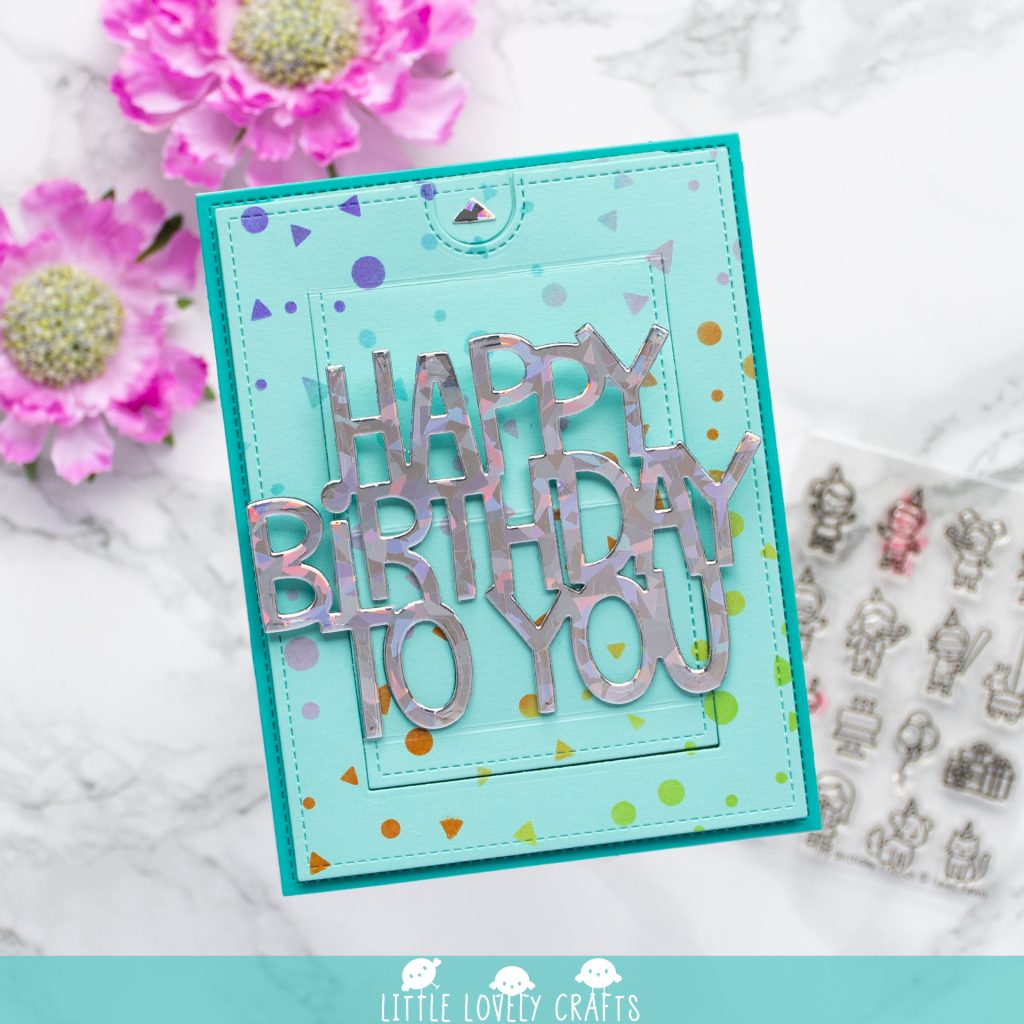
Hello! Today I wanted to share a slider card with the Happy Birthday To You sentiment from the new Lawn Fawn summer release. I don’t own a die to create the slider for me, so I got creative and made my own mechanism. I’m going to explain how I made the slider, but I will also share a video very soon!
I started die cutting Happy Birthday To You from some Holographic, Peacock and Black Licorice cardstock. I adhered them with liquid glue.
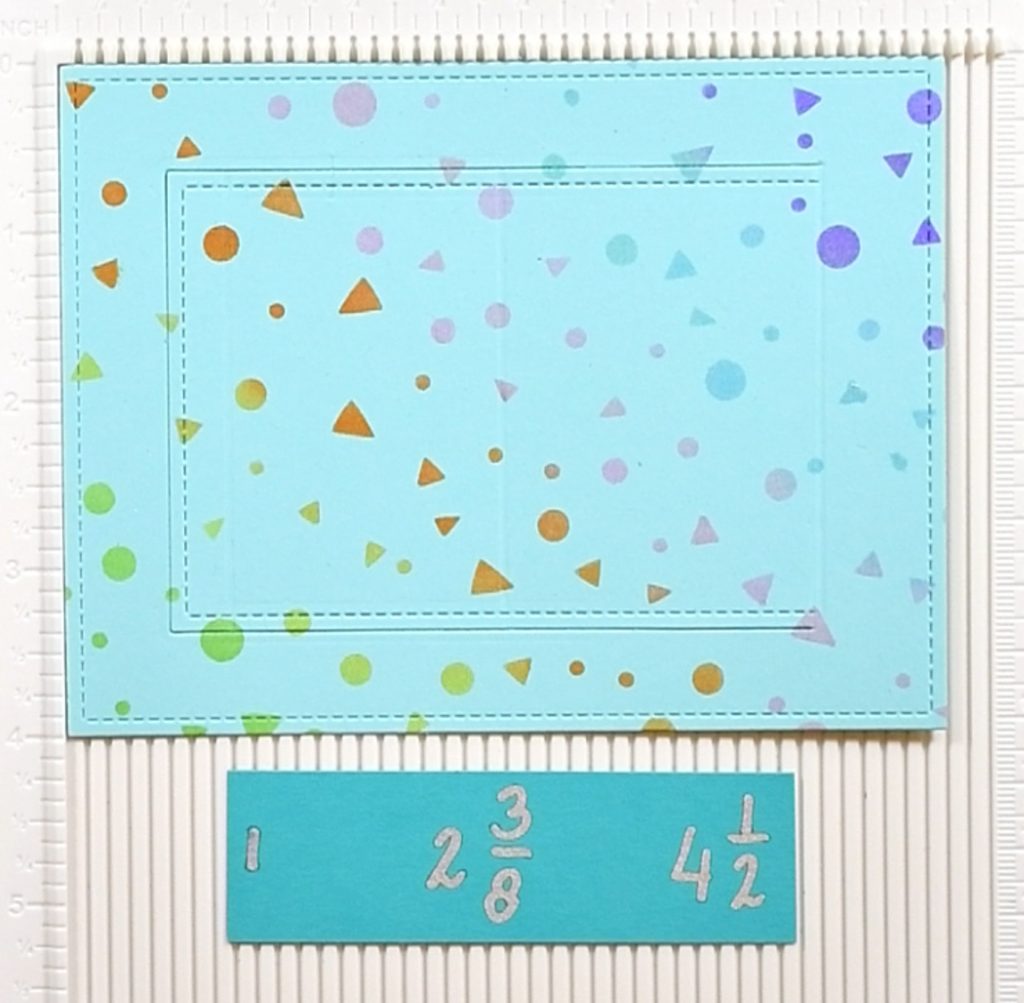
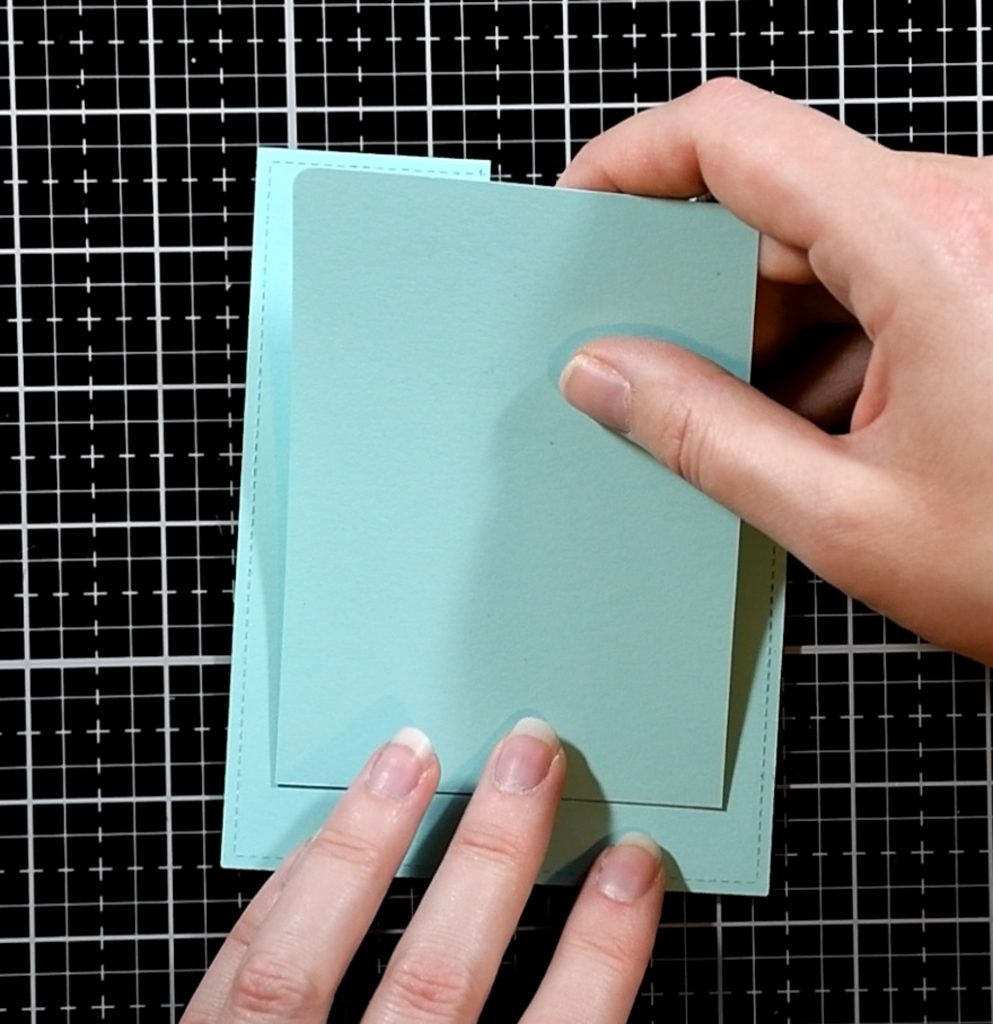
You will need a cardstock panel cut with the Outside in Stitched Rectangle Stackables. I used Mermaid cardstock from Lawn Fawn. Use the Confetti Stencils to add a nice pattern to it, since it’s easier to stencil now without the folds you are going to make later.
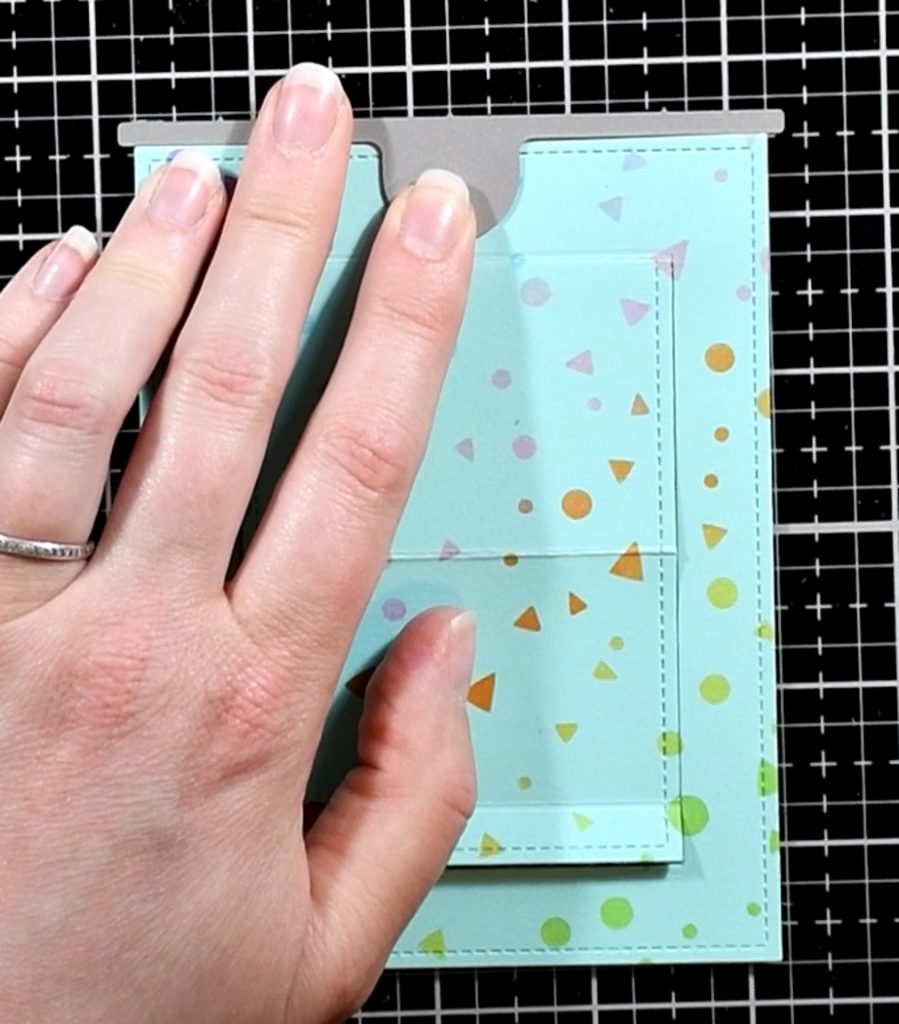
Then I used the second largest Small Rectangle Stackables to cut the moving slider part. Don’t die cut it all the way to the top, but leave the top out of your cutting plates. Next I used the notch piece from the Let’s Toast Pull Tab Add-On. And I cut the arrow piece from some Holographic cardstock.
Then I scored the slider part I just created at 1”, 2 3/8” and 4,5”. Use your bone folder to make a nice fold along those lines. Alternate between the folds, so that the middle comes up and the rest can move along the slider mechanism. Add a piece of scor-tape to the bottom of the moving slider part.
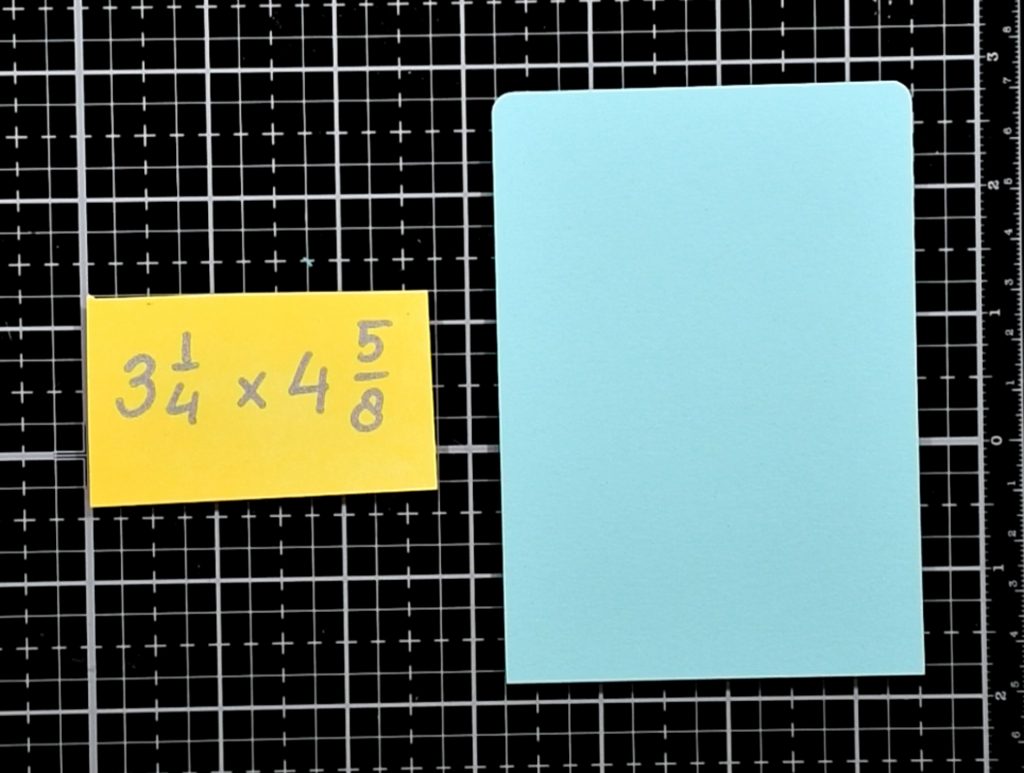
Cut a piece of cardstock at 3 1/4” by 4 5/8” and you can round the top edges with a corner punch. I also used the Confetti Stencil on this piece, so it matches with the front panel. With a corner punch I made the edges a little more round. Now it could be adhered to the back of my moving slider part. Since I measured it correctly, it fits perfectly. I added the little piece from the notch I made earlier to the top and a holographic arrow as well.
I added the sentiment to my moving slider part, making sure not to put any liquid glue at the top, because that is rising up with the slider.
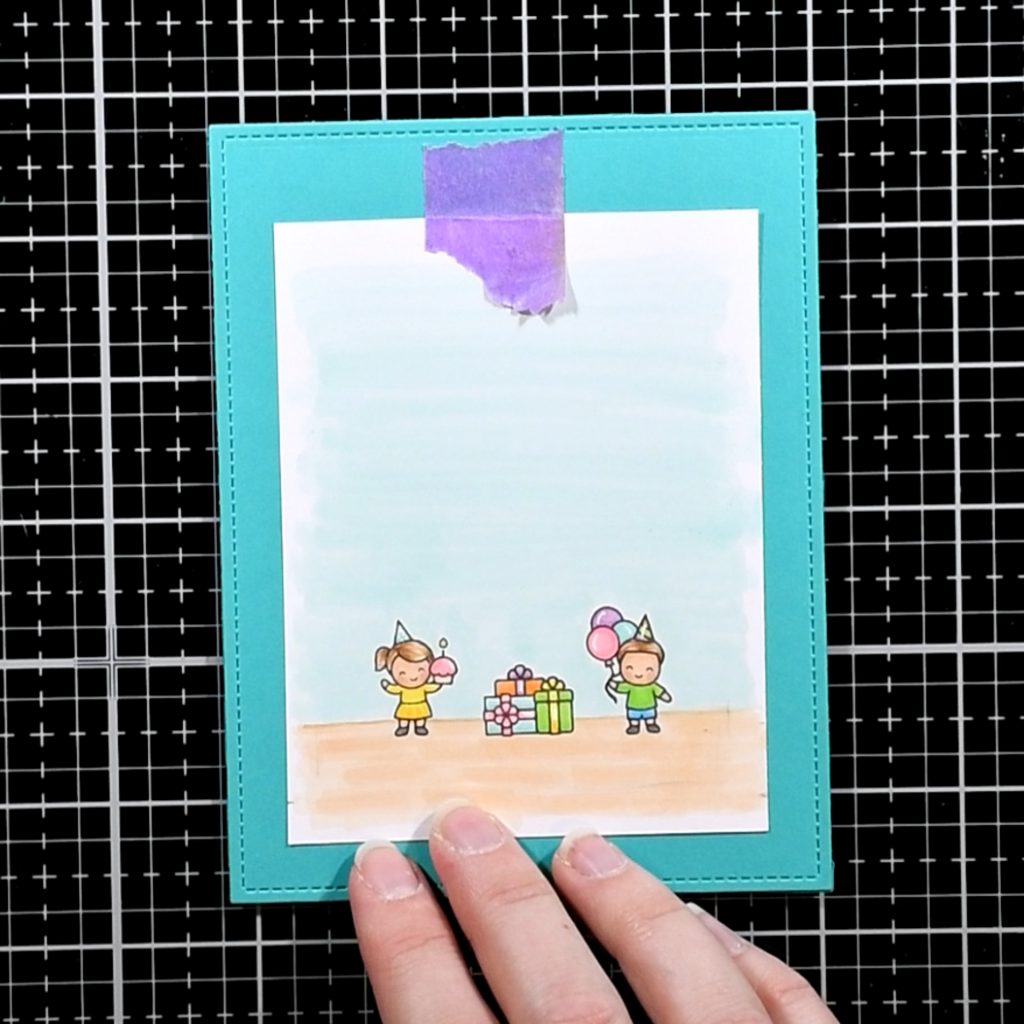
I stamped my images from Tiny Birthday Friends on copic friendly paper. I cut that panel a little wider than the slider base. I did some masking to get the boy and girl to hold the balloons and cupcakes. I colored everything with my Copic Sketch Markers and used my white gel pen to add some accents.
I used the Large Stitched Rectangle Stackables on some Peacock cardstock. I centered and then adhered the copic friendly paper onto the bottom of my Peacock cardstock, but I made sure the opening from my slider would cover the edges nicely.
Then I added foam strips to the back of my front panel, but not on the top, and added it to the peacock cardstock. Now the only thing left to do was adding it to a white card base. And that’s it! A nice slider card without any special dies.

(✿◠‿◠) L A W N F A W N S U P P L I E S:
- Let’s Toast Pull-Tab Add-On
- Small Stitched Rectangle Stackables
- Outside in Stitched Rectangle Stackables
- Large Stitched Rectangle Stackables
- Confetti Stencils
- Holographic cardstock
- Black Licorice cardstock
- Mermaid cardstock
- Peacock cardstock
- Stamp shammy
- Starry Stamp Shammy Case
- Bone folder
(✿◠‿◠) O T H E R S U P P L I E S:
- Copic Sketch Markers
- Distress ink: kitsch flamingo, carved pumpkin, squeezed lemonade, twisted citron, salvaged patina, wilted violet
- Liquid glue
- White gel pen
- White coloring paper suited for copic markers
- White stamping card
- Foam lines
- Adhesive Eraser
- Scor-Tape 0.4
- Full Stick Post-It note
- Corner Punch
- Scissors
- Craft Tweezers
- Embellishment wand
- Vaessen Creative cutting and scoring board
- Vaessen Creative Work Easy Magnetic Work surface
(✿◠‿◠) D I S C L A I M E R
As a design team member for Butterfly Reflections Ink I’m receiving products/discounts and I’m promoting their shop.